本文来自于我自己学习Flutter时所学习的教程的中文翻译,原文链接FLUTTER LISTVIEW TUTORIAL – WEIGHTTRACKER 1
英语水平有限,内容未必准确
在Flutter里创建一个ListView
1. 一个简单的ListView
1
2
3
4
5
6
7
8
9
10
11
12
13
14
15
16
17
18
19
20
21
22
23
24
25
26
27
28
29
30
31
32
33
34
35
36
37
38
39
40
41
42
43
44
| import 'package:flutter/material.dart';
class HomePage extends StatefulWidget {
HomePage({Key key, this.title}) : super(key: key);
final String title;
@override
_HomePageState createState() => new _HomePageState();
}
class _HomePageState extends State<HomePage> {
List<String> strings = new List();
void _addWeightSave() {
setState(() {
strings.add("new string");
});
}
@override
Widget build(BuildContext context) {
return new Scaffold(
appBar: new AppBar(
title: new Text(widget.title),
),
body: new ListView(
children:
strings.map((String string) {
return new Row(
children: [
new Text(string)
],
);
}).toList(),
),
floatingActionButton: new FloatingActionButton(
onPressed: _addWeightSave,
tooltip: 'Add new weight entry',
child: new Icon(Icons.add),
),
);
}
}
|
从这段代码能想像到我构建的是一个最简单的ListView。
ListView 部件(widget)是列表的主容器,它装载着所有的内容,但是我们只需要关注它的children属性。
我们需要给ListView.children提供一个部件列表(list of Widgets)用于显示。所以我们用经过初始化后的装着String的List来生成每一行的容器,每一行的容器内只装着一个字符串。
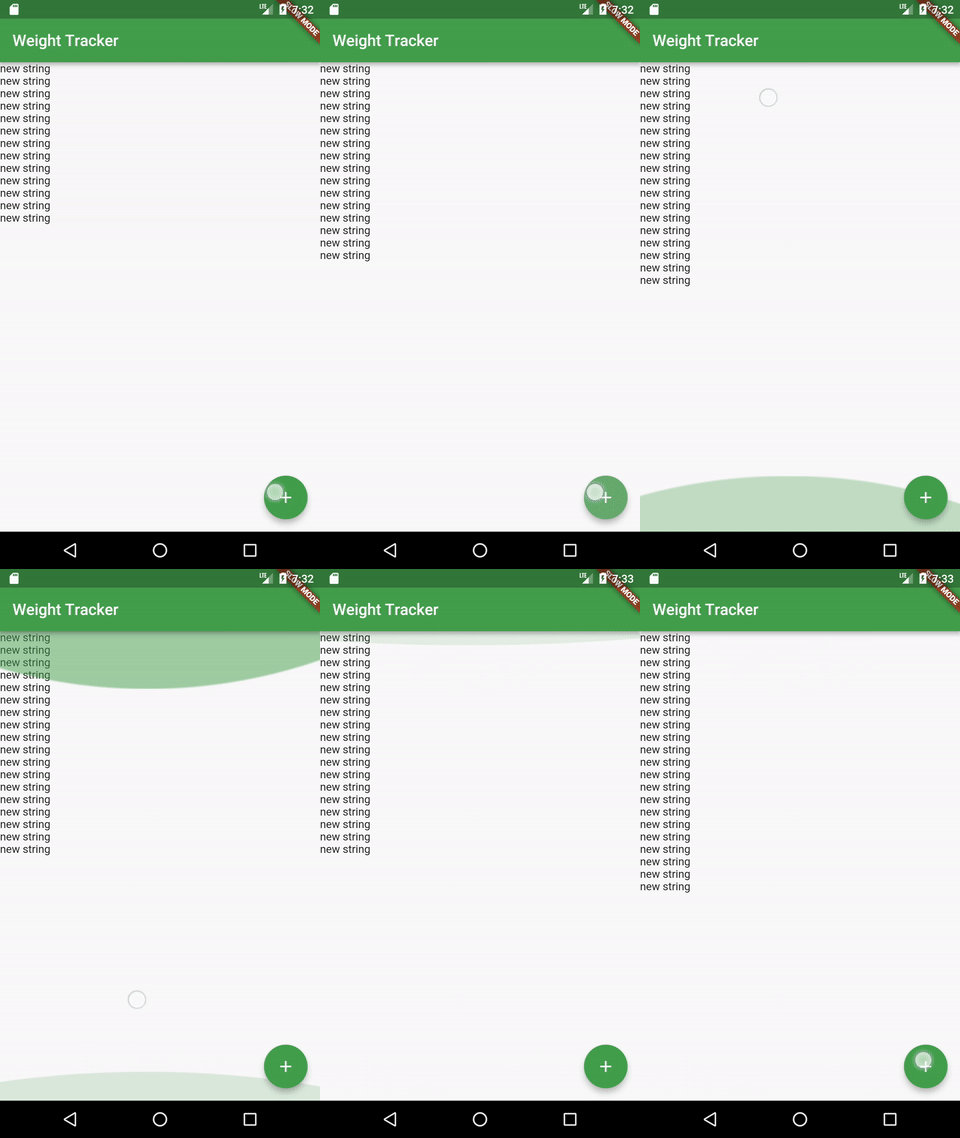
这样我们就得到了下面这样的一个列表。

现在让我们做一些不是Hello World的事情。
2. 复杂的行布局
2.1 创建model
1
2
3
4
5
6
| class WeightSave {
DateTime dateTime;
double weight;
WeightSave(this.dateTime, this.weight);
}
|
2.2 创建布局
1
2
3
4
5
|
dependencies:
flutter:
sdk: flutter
intl: ^0.15.7
|
1
2
3
4
5
6
7
8
9
10
11
12
13
14
15
16
17
18
19
20
21
22
23
24
25
26
27
28
29
30
31
32
33
34
35
36
37
38
39
40
41
42
43
44
45
46
47
| import 'package:flutter/material.dart';
import 'package:intl/intl.dart';
import 'package:weight_tracker/model/WeightSave.dart';
class WeightListItem extends StatelessWidget {
final WeightSave weightSave;
final double weightDifference;
WeightListItem(this.weightSave, this.weightDifference);
@override
Widget build(BuildContext context) {
return new Padding(
padding: new EdgeInsets.all(16.0),
child: new Row(children: [
new Expanded(
child: new Column(children: [
new Text(
new DateFormat.yMMMMd().format(weightSave.dateTime),
textScaleFactor: 0.9,
textAlign: TextAlign.left,
),
new Text(
new DateFormat.EEEE().format(weightSave.dateTime),
textScaleFactor: 0.8,
textAlign: TextAlign.right,
style: new TextStyle(
color: Colors.grey,
),
),
], crossAxisAlignment: CrossAxisAlignment.start)),
new Expanded(
child: new Text(
weightSave.weight.toString(),
textScaleFactor: 2.0,
textAlign: TextAlign.center,
)),
new Expanded(
child: new Text(
weightDifference.toString(),
textScaleFactor: 1.6,
textAlign: TextAlign.right,
)),
]),
);
}
}
|
根布局是一个padding,这是为了让布局间不轻易接触而做的一个基础的包装。
padding的子节点(child)是一个Row容器,包含了3个子节点(children),Row部件(widget)内部的所有部件会水平排列。
为了让Row内部3个部件每个都占1/3的空间,所以3个部件都使用了Expanded来包装。
左边的列是一个Column部件。Column跟Row类似,不过是纵向排列。在Column.children里我们放置了两个Text用于显示model对象的时间和星期。
中间和右边的列都是一个简单的Text部件,中间列设计为显示保存的重量,右边的列用于显示跟前一项重量的差值。

2.3 把这些都组装起来
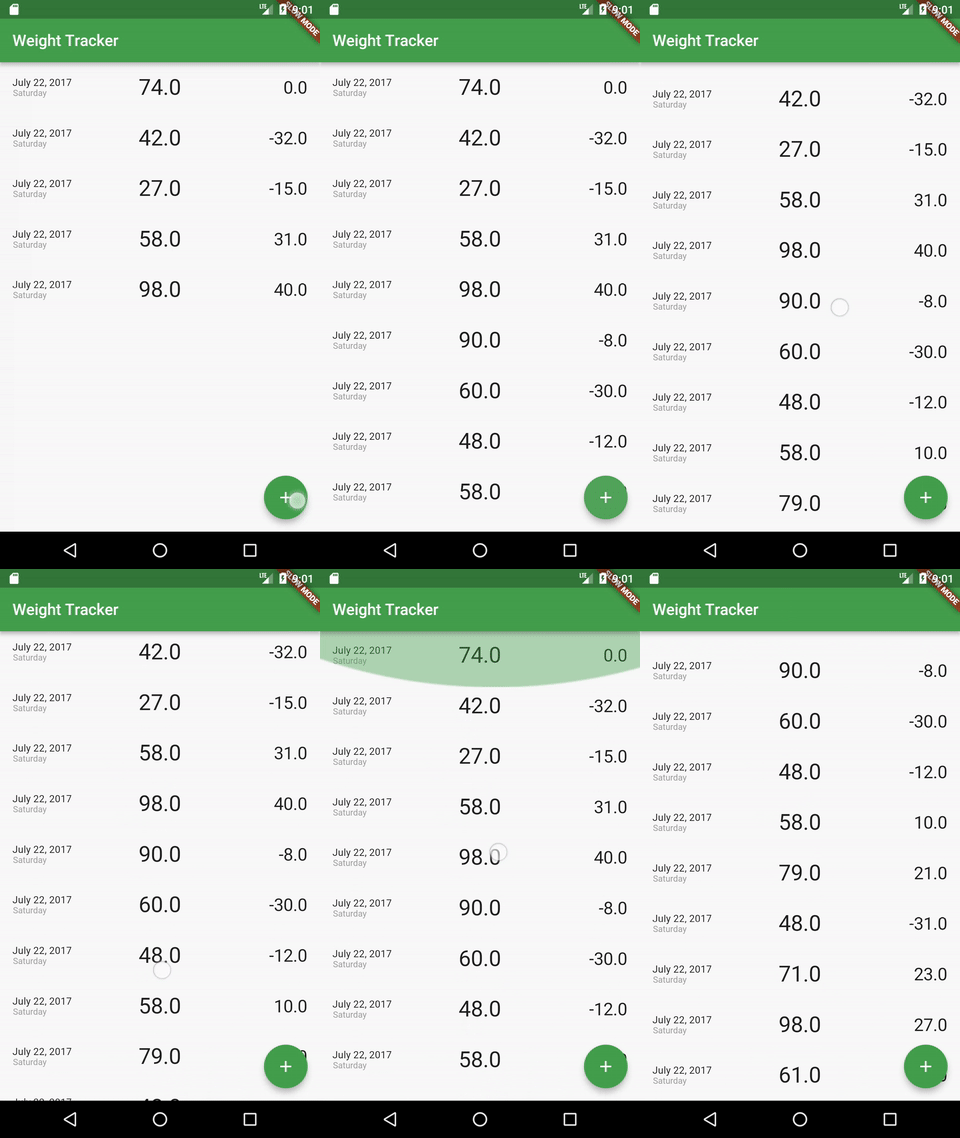
用我们的新的WeightListItem布局对象替换掉前面每行的布局(记得添加import)
1
2
3
4
5
6
7
8
9
10
11
12
13
14
15
16
17
18
19
20
21
22
23
24
25
26
27
28
29
30
31
32
33
34
35
36
37
38
39
40
41
42
43
44
45
46
47
48
| import 'dart:math';
import 'package:flutter/material.dart';
import 'package:weight_tracker/WeightListItem.dart';
import 'package:weight_tracker/model/WeightSave.dart';
class HomePage extends StatefulWidget {
HomePage({Key key, this.title}) : super(key: key);
final String title;
@override
_HomePageState createState() => new _HomePageState();
}
class _HomePageState extends State<HomePage> {
List<WeightSave> weightSaves = new List();
void _addWeightSave() {
setState(() {
weightSaves.add(new WeightSave(
new DateTime.now(), new Random().nextInt(100).toDouble()));
});
}
@override
Widget build(BuildContext context) {
return new Scaffold(
appBar: new AppBar(
title: new Text(widget.title),
),
body: new ListView(
children: weightSaves.map((WeightSave weightSave) {
double difference = weightSaves.first == weightSave
? 0.0
: weightSave.weight -
weightSaves[weightSaves.indexOf(weightSave) - 1].weight;
return new WeightListItem(weightSave, difference);
}).toList(),
),
floatingActionButton: new FloatingActionButton(
onPressed: _addWeightSave,
tooltip: 'Add new weight entry',
child: new Icon(Icons.add),
),
);
}
}
|
这样就完成了!
我希望你会喜欢这篇文章,如果有什么意见和建议希望留言反馈!
你可以在这里找到整个项目。

